Table of Contents
14.0...Blog Future Content and Updates
15.0...Changelog
Other Guides:
Decoration Categories and Drop Rates
Full Palico Gadget Guide
How to Get All Mantles and Boosters
WARNING: This guide may contain spoilers! Please use at your own discretion or only look at specific points which might contain the information you need.
15.0...Changelog
Other Guides:
Decoration Categories and Drop Rates
Full Palico Gadget Guide
How to Get All Mantles and Boosters
WARNING: This guide may contain spoilers! Please use at your own discretion or only look at specific points which might contain the information you need.

[1.0] Introduction
Welcome! In this article we'll talk about your tools for survival in Monster Hunter World. This will contain data starting from the basics and then all the way to the advanced stuff. If I currently do not have the information you are looking for, please take your time reading through the other sections as I have dropped down links to other references as well. This will be updated as I also progress in this game.A Short Review, Why You Should Get This Game, and What's Waiting for New Players:
Monster Hunter is not your typical "hack and slash". There is so much depth to this game that the learning curve is steep. Although for Monster Hunter World, it is said that the game will ease you into it. So if you want to dive into the franchise, this is a good starting point. Think about teaching a child how to ride a bicycle, you'll have to let them ride with training wheels until the time comes when you are finally able to take them off and let the young blood hold his own. In this game, you are to embark on quests to take down loot boxes. Yes, loot boxes, and ones that have sharp fangs and claws that will kill you outright if you don't know what you're doing. Looking for rewards and loot? You'll have to work hard to earn them. To obtain most of the good items you'll have to kill a monster multiple times and then carve out materials from their bodies which will be used in crafting your equipment. How cool can that be? Kill the monster and use his parts to create better weapons and armor. Also, your character does not level up. Therefore, there is no such thing as out-leveling your enemies. Your strength will rely greatly on your equipment and a particular set of skills. Skills that you will acquire over a very long play time. Skills that will allow you to be a nightmare for monsters in this game. That's right, the only way through this is experience, the more you play, the more you learn. They say what doesn't kill you makes you stronger. No, the more you die in this game, the stronger you become, at least during the early stages of your Monster Hunter career. "Carting", which is a term used for fainting or dying in the game (you get pulled off in a cart back to base if you do) is going to be common thing until you learn the different aspects of the game such as figuring out the monster's attack patterns or behavior, putting together the right set of equipment, hitting its weak spots, breaking some of its body parts, etc. There is no health bar for each monster and it will feel like each one of them is a "boss" equivalent to other games. You can tell how low their health is is via visual confirmation on their appearance and behavior. Most of them will be limping or running away back to their nest to sleep in an attempt to recuperate. There are also different types of weapons which will allow you to choose the one which suits your playing style. Finally the the best part of this game is being able to customize your own cat. Kidding. Seriously, being able to work with friends to take down a monster is one of the key elements that made this franchise successful. My last game was Monster Hunter Freedom Unite on PSP. It was ages ago but I still remember the happy times as we hunted down Rathalos while we were drunk. Good times. All these things guarantee that you'll have a good time. You can count on that. I'm confident that it is worth the time and money. Tell your friends about it as this is going to be one of the biggest games of 2018. Capcom really did a good job with Monster Hunter World. It's 91% on Metacritic and it has a rating of 9.5/10 and 8.5/10 by IGN and GameSpot respectively. Hell, I'd give it an 11 until further notice!
If you are reading this then you are probably one of us. Cheers, fellow hunter! I am a quite outdated but I will do my best to provide quality information for you guys.
The Main Objective:
To create the most bad-ass Palico in the Monster Hunter realm. Kidding again. Meowch. The goal is to come up with a complete or detailed guide in a format that is easy to understand and one that focuses on new and upcoming hunters. If not, then at least consolidate entry points here that would lead them to the right direction on where they can find the data or tips they need to become successful in Monster Hunter World. I reckon this is really going to take a lot of time and effort. If I see or discover something useful or significant, I will be sharing it with you. I will be updating this blog entry the rest of the way, so stay tuned!
Hopefully, I'll also get a grasp of the gameplay and all the important aspects of the game soon. I haven't been able to play a lot of beta as I am working full time in real life and recently got married last November. I can imagine I'll have less time when we finally have a baby. Still, no matter how late, I'll continue to work on it as I feel a lot of us are really going to enjoy this game for a long, long time.
Shoutout!
Shoutout to Fextralife for the superb wiki, even granting me permission to use some of the information for my tiny blog. It would be data overload for this small article so I'll have to point everyone to the wiki for the specific details. I currently do not have the means and time to gather data as well. This would serve as a simple form and the readers should move over to the wiki for the specifics.
Guys, don't forget to join the groups too, this is by far one of the most active and friendliest communities you'll ever see.
[2.0] Controls and HUD Details
Basic controls for the game are as follows:
Heads-up display details:
 1. Day/Night Time Indicator - displays day or night and timer before each cycle
2. Player Info - this gauge shows current health and stamina as well as active buffs or status ailments beside the player name. Health or stamina bar color changes depending on status ailments. Example is poison which makes the health bar turn purple and iceblight which turns the stamina bar light blue.
3. Sharpness Gauge - this bar shows the current sharpness of your weapon. Color varies based on sharpness level from lowest to highest: red, orange, yellow, green, blue, white, and purple.
4. Mantle/Booster Status - this displays the availability of your equipped mantle or booster.
5. Special Gauge - this is a special gauge specific to your weapon, in this case this is a Spirit Gauge for the long sword. This will vary among weapons and some do not have this.
6. Party Info - displays list of party members along with their current health and active buffs or status ailments.
7. Mini-map - displays current location on map, monster and items within range. Turns red when a monster is aggro towards you. Purple if a monster is aggro and you are in hiding.
8. Pending Quests/Objective - displays current quest or objective.
9. Target Lock-on - lock-on camera to specific target, press R3 to cycle through available targets. Use sparingly, free aim and rotating camera via right analog stick is still better imho.
10. Basic Button Input Legend - displays button input for certain moves available in current state.
11. Pending Quests/Objectives - displays current list of quests or objectives.
12. Chat and Other Info - displays chat messages, dialogues and other information such as item descriptions and pick-ups.
13. Slinger Ammo/Special Item - displays current slinger ammo equipped or special items such as the fishing rod and capture net.
14. Items - list of usable items in your item pouch, use left and right to scroll through
Radial Menu
Pressing L1 will outside of the town will open up your Radial Menu. Press the directional buttons to select a category you assigned initially, and then use the right analog stick to select the item of your choice. You can fully customize your Radial Menu. Here you can assign shortcuts from items, crafting, to gestures and chats. You can change the setting of your radial menu on the control options. Type 1 requires only releasing right analog stick to use the item. Type 2 requires you to press R3 after pointing to that item. There are other options here so feel free to tweak this to your liking or to a setup you are most comfortable with. You can even change the configuration in way that you can use the triangle, x, square and circle button instead of the directional buttons. Proceed to section 3.7 for more details on auto-crafting.

Back to top...
[3.0] Game Features and Mechanics
3.1...Character and Palico
One of the best things I enjoyed about Monster Hunter World is how detailed the character and Palico customization is. You can change a lot of stuff such as the characters hair, nose, eyes, skin color, even apply face paint and make-up.Your character's Hunter Rank increases as you gain experience via quests. This is displayed on the Guild Card information. When you reach Hunter Rank 11 I believe is the start of High Rank. You can still do low rank quests in case you missed any. Hunter Rank is capped until certain conditions or milestones are met. Hunter Rank 15 is the maximum until you complete the story the first time. You will encounter this cap again on Ranks 29, 49, and 100 and will need to complete certain quests to move forward. Don't worry as the hunter exp seems to get accumulated even as you do quests and on the rank limit. You will see your real rank as you get past the cap. The maximum Hunter Rank is 999. Your Palico also levels up as you progress into the game. The max level is 30. To learn more about Palicos go to section 3.8 under Palico Gadgets and Tailraiders.

Back to top...
3.2...Navigation
Wherever you are going, the scoutflies are your best friends. These flies leave a light green trail when tracking a monster or simply when pointing you to specific clues such as footprints and gashes, or items in the environment. It is important to always pick up these clues to level-up your research for the Hunter's Notes or Monster Field Guide which will allow you to gain more information and track that monster faster and easier in the long run.
You can press the touchpad to display the map. From there you can press R3 on a specific monster/item and let the scoutflies lead you there. Pay attention to the map as you can also see the whereabouts of small monsters, bonepiles, plants, and other stuff that you can use to craft items. Image below shows that I pressed R3 on Anjanath. Once I exit the map, the scoutflies will track lead me to the monster.

Regular monsters and tracks will have light green color for scoutflies while Elder Dragons and Tempered monsters and tracks will have a blue color.

Additionally, the mini-map will show icons above the monster or glow depending on the given situation or the monster's status.
White Eye - monster sees you but not aggressive towards you
Yellow Eye - monster is in combat mode
Red Eye - monster is enraged
Drooling Monster Head - monster is exhausted
Exclamation Point - monster is retreating, heightened alertness
Skull - monster is near death
Up Arrow with numbers in Green - elevation, monster is above
Down Arrow with numbers in Red - elevation, monster is below
3.3...Weapons
 There are a total of 14 weapons in the game, these are: Dual Blades, Charge Blade, Great Sword, Long Sword, Sword and Shield, Switch Axe, Lance, Gunlance, Insect Glaive, Hammer, Hunting Horn, Bow, Light Bowgun and Heavy Bowgun. For more detailed information on these weapons, go to section 6.0. Before you jump into battle with the weapon of choice, make sure to study and understand the following mechanics:
Damage Type
There are 3 types of damage in Monster Hunter. First is cutting/severing damage. Most common examples are sword slashes and lance thrusts. This type of damage is most effective at cutting off the monster's tail. Next is blunt/concussive/impact damage. Most common examples are hammer smashes and shield bashes. Hitting the monster repeatedly on its head may cause a stun and also reduced stamina. Lastly are shoot/ammo attacks which are projectiles from your ranged weapon. The effect will vary depending on the attack or ammo/coating used. If working as a team, sword users may want to focus on the tail and the hammer users on the head. Take note that huge swings from your attacks can also knock or blow your teammates away so it is also a good strategy for team members to focus on different parts.
Attack Power
This is the raw damage without factoring in other effects and elemental damage. This is the most important part in the damage computation. More on this in the future as we figure out how to exactly compute the actual damage.
Sharpness
Sharpness will affect your cutting power and damage output. This will decrease after each hit. Most monster parts have a certain level of sharpness required before you can eventually deal significant damage. Not meeting that requirement will make your attack bounce or get deflected. Some weapons such as the Great Sword also loses damage when blocking. Sharpness can be restored using a whetstone. Color varies based on sharpness level from lowest to highest: red, orange, yellow, green, blue, and white. The damage multiplier for each sharpness level is 0.50, 0.75, 1.00, 1.05, 1.20 and 1.32 respectively.
Affinity
Affinity is the chance to deal more or less damage with your attacks. After gathering data from websites and veteran players, it appears that the damage difference is at 25% or a multiplier of 1.25 for positive affinity and 0.75 for negative affinity. Items with increase in affinity will stack directly (example: weapon with 10% affinity + weakness exploit lvl 3 50% = 60% affinity on monster's weakspot)
As an example:
Weapon A has an affinity of 15% - this weapon has a 15% chance to deal 25% more damage (normal damage x 1.25).
Weapon B has an affinity of -15% - this weapon has a 15% chance to deal 25% less damage (normal damage x 0.75).
Think of this as similar to critical hits on other games but with a certain twist. The chance can also be improved with equipment skills. Critical Boost's description is misleading as it does not increase critical damage by 30, 35, and 40% respectively. It only changes the multiplier from 1.25 into 1.30, 1.35 and 1.40 respectively. Something to keep in mind if this is something that you want to build your character with.
Elemental Damage
Like most games, elemental damage is also present in Monster Hunter World. There are 5 types of elemental damage. These are: Fire, Water, Thunder, Ice, and Dragon.
Fire - strong against Ice, weak against water. Having low resistance to fire attacks will increase the chances of having fireblight. Fireblight reduces the red part of the health bar and eventually the green part. This can be removed by rolling on wet surfaces.
Water - strong against fire and weak against thunder. Having low resistance to water attacks will increase the chances of having waterblight which lowers stamina recovery. Use a nulberry to remove it.
Thunder - strong against water and dragon, weak against ice. Having low resistance to thunder attacks will increase the chances of having thunderblight which causes you to get stunned more easily. Use a nulberry to remove it.
Ice - strong against thunder and dragon, weak against fire. Having low resistance to ice attacks will increase the chances of having iceblight which causes your faster stamina depletion. Use a nulberry to remove it.
Dragon - strong and weak against itself (reminds me of Pokemon ha ha). Having low resistance to dragon attacks will increase the chances of having dragonblight which can lower affinity, nullify elemental damage or reduce chances of causing abnormal status.
Abnormal Status Effects
The game lists status effects under the element tab info of the weapon which makes it confusing. However the monster field guide, certain skills and the Hunting Tips on the loading screen states that there are only five elements which are the ones mentioned above. Therefore, we list these under status effects and not elements. Some monsters are weak and strong against certain abnormal status. The following are the abnormal status effects in the game which applies to both player and monster:
Poison - gradually decreases health, use an antidote to remove it
Paralysis - unable to move for a short period of time, can recover after getting hit by ally
Sleep - ZzzzZzz... next hit will do double damage and wake you up (no damage if hit by teammate). One useful strategy is to place Barrel Bombs on a sleeping monster's head and the player with the highest damage uses his attack to trigger the bombs as well as hitting the monster in the process. This is called "Sleep Bombing". If you are hit by sleep gas or something similar, such as the Radobaan's gas, use an Energy Drink to prevent your character from going to sleep.
Stun - almost the same as paralysis, unable to move for a short period of time, can recover after getting hit by ally
Bleeding - causes health-loss when moving, stay still and crouch for a short period of time or use Astera Jerky (I had to learn the hard way, fu Odogaron).
Blastblight - cause a damaging explosion after a certain amount of time has passed, or upon sustaining a heavy impact. Dodge roll multiple times on the ground to remove.
Effluvial Buildup - lowers maximum health, use a nulberry to remove it. This is different from the effluvia smoke in rotten vale. The gradual decrease in health may be countered with Effluvial Expert skill. However to counter both the decrease in health and the effluvial buildup status inflicted by Vaal which lowers maximum health, you need the Effluvia Resistance skill.
For a more detailed explanation, check weapon section on Fextralife's wiki or click here.
To upgrade weapons you need to follow the path on the weapon tree and provide the specific materials for your weapon of choice. You may need multiple weapons on its basic form if you want to create different weapons.
Elderseal
This is a new attribute introduced to Monster Hunter World. The values may be low, medium and high. Elderseal will prevent certain monsters, mainly elder dragons and Kirin from using certain special aura abilities or reduce their effectiveness. The effect of elderseal is as follows. Copied from IGN:
Kirin: Reduces the level of its enraged lightning phase, which hardens its skin.
Teostra: Reduces its flame and blast auras, which prevents long-range weapons from penetrating. Elder Seal will also prevent Teostra from using its very powerful special move, Supernova.
Kushala Daora: Reduces its wind aura, which knocks hunters backs and prevents long-range weapons from penetrating.
Vaal Hazak: Reduces the amount of effluvium it expels, which also reduces its attack power.
Back to top...
3.4...Armors & Charms
There are basically 5 parts to a complete armor set for your character.
Some armors will grant you skills. For a detailed list of skills, click here.
To see armor stats and appearances, click here.
Additionally, some armors have a skill bonus when equipped as a set such as the Anja armor which grants the skill "Adrenaline" that temporarily reduces stamina depletion when health is at 40% or lower. You need at least three pieces of the set. This screenshot shows a complete list of skills the character has based on the equipment. To increase a certain skill's level, you need to stack multiple pieces of that have the same skill. Example is you have a chest piece with Attack Boost level 1, a helm with Attack Boost level 1 and leg armor with Attack Boost level 2, you will have an end product of Attack Boost level 4 for your character. This can be further improved with charms and decorations. Say for example a charm with level 2 Attack Boost and a decoration with level 1 Attack Boost, you will be able to achieve the maximum for Attack Boost which is level 7.


Charms
Charms are accessories you can equip to enhance your character's skills. They can give you one or more skills. Unlike the normal armor pieces, they do not provide any defense. These can be upgraded to increase the skill's level. Much like armors you need materials from monster to forge one. The ability to forge charms is unlocked as you progress into the game. If I remember correctly this is via the Elder Melder in the Research Base once you have unlocked the Coral Highlands map.

Back to top...
3.5...Decorations/Jewels
As you get to high rank, you will be able to get decorations/jewels which you can put into your weapons or armors with slots. Again, don't be confused with jewels and gems. Jewels are decorations to put into equipment to grant skills or increase their level and gems are materials obtained from monster used to craft equipment. A weapon and armor may have more than one slot but each slot has a level. Slot level must correspond with Jewel level. So far the highest jewel level is 3. Pay attention to the jewel icon on the equipment. Refer to the screenshots below. The Nergigante Beta helm has 2 slots but only level 1 jewels can be placed. The Magda Facultas I has 1 level 2 slot and the Dragonking Eyepatch has 1 level 3 slot. As an example, the last screenshot has a Poisoncoat Jewel 3 slotted into the Dragonking Eyepatch. To farm decorations, the most effective way is via Tempered Monsters investigation quests. You can also meld decorations via the Elder Melder (see section 5.0). Here is a list of decorations and rarity courtesy of Hecaitomix:
For the drop rates and other info click here. To view a list of decorations click here.


Back to top...
3.6...Other Equipment
The are other useful equipment in the game that you can use in your adventure. There are what we call mantles and boosters which can have various effects. They have a long cooldown so use them wisely. Example is the Ghillie Mantle which conceals you from the monster's view temporarily. Another example is the Glider Mantle which grants your character a short glide after a jump, making mounting monsters a bit easier. Some booster examples are, the health booster that gradually restores health and affinity booster that enhances affinity within a certain range when planted into the ground. For a complete list of mantles and boosters click here. Finish the story in order to unlock a second slot for these. Click here for a full guide on how to get all of them.
Back to top...
3.7...Consumable Items
To aid in your battles, you can craft items such as potions, antidotes, enhancement items, as well as tools such as traps and various ammos. You can set auto-craft which automatically puts together obtained materials in the field to create a specific item. This is also very useful since the item pouch have a limit to how much you can bring per item. You can auto-craft using the radial menu and also manually do this on your item box. To auto-craft using the radial menu, select options and customize radial menu. Under radial menu, select crafting tab and assign the item you want on a radial menu slot. For detailed information on crafting and consumable items click here. Some items in the crafting list can be unlocked upon having the materials required and selecting the ??? in the list. This will unlock the item and made available for crafting.
Buffs Stacking
Several consumable items can be used to buff your character such as increased attack and defense. These item buffs will stack with hunting horn or palico gadget buffs as well as the power/armorcharms and power/armortalons and food from the canteen. However not all of these will stack with one another so here's what you need to remember:
1. Demondrug & Armorskin - increase attack and defense respectively(the mega versions will give more attack and defense), these will last for the entire quest or until you faint
2. Demon Power & Hardshell Powder - increase attack and defense respectively, will last for 3 minutes
3. Might Seed and Adamant Seed - increase attack and defense respectively, will last for 3 minutes
4.
3. Might Pill and Adamant Pill - increase attack and defense respectively, will last for 30 seconds
5. Drug + Powder + Seed/Pill will stack, meaning you have to choose either pill or seed depending on your needs
Basically, you can have the full benefits by casting Demon Drug, Demon Powder, Might Seed or Might Pill. This is the same for the Armorskin.
Auto-Crafting
One of the best uses of this radial menu is to utilize the auto-crafting feature. There is a limit to the quantity of item in your item pouch that you can bring. If you carry the materials needed to craft a certain item, you can use the radial menu to craft that item when you run out of stock. Example, if you have exhausted or about to run out of the initial 10 Mega Potions you carry, you can craft via radial menu if you added it to the menu under auto-craft items. Provided you are also carrying Potions and Honey, in your item pouch, selecting Mega Potion in your radial menu will then craft one. Take not of this as this might save your life or make it more convenient in the future. Refer to the video below for auto-crafting using the radial menu.
Back to top...
3.8...Combat and Tools
This section is also work-in-progress. Here we'll talk about combat mechanic-specifics. Monster Hunter is not your typical "Hack and Slash" game. A lot of players lose their motivation after hitting a hard wall from the game's difficulty. In general, you start by unsheathing your weapon and then attack your target until it dies. Not! There's more to this and that's what sets Monster Hunter apart from other games in its genre. The monster do not have health bars, new players are lucky enough that this game can display the amount of damage dealt. This was not the case during the previous releases. Learning about their weaknesses such as soft body parts, which element or status ailment are they most susceptible to are some of the key factors toward a successful hunt. Additionally, whetstone can now be used infinitely while on previous games you'll have to purchase these. So don't be afraid to sharpen up that weapon when needed. Here are some tools and mechanics that you should take note of during combat. This will make hunting easier or more fun for you. You also have the option of capturing the monster which will be discussed below.Slinger
This is like your secondary weapon and has many uses. It is a slingshot that can fire stones and other ammos based from materials you can find in your environment. You can use this to distract a monster or even swing to a different area using a wedge beetle. You can also shoot at available traps in the area so be on the look out for hanging boulders you can shoot at or flashflies which can blind your target. You can activate your slinger by pressing L2 and then R2 to fire. Below is a screenshot of what a wedge beetle looks like. You can even use it to swing or propel yourself to perform a jumping attack which can lead to mounting a monster. In the future we might be adding a complete list of slinger ammos and their effect. For now, try to pick up items such as stones and pods and test the effect on your targets. Additionally, you can hit the monster continuously when it tries to run away, doing so will agitate it make it fight you again.

Be sure to check your environment for traps that can help you take down a monster faster or disable them to get you free hits.


You will also encounter Grimalkynes that will offer to help you disable the monster if you are able to mount it on that area. More on this as you understand the combat mechanics below.


Breaking a monster's body parts is essential to obtaining materials for your equipment. Most common breakable part is the monster's tail which can often be severed by cutting damage. Keep attacking a certain part especially its weak spots which are usually breakable. After gathering tracks and defeating monsters, you will see its weaknesses and breakable parts on the monster field guide. Apart from being able to gather extra materials from this, this can also limit the monster's movements or weaken some of its attacks. The tail can be carved separately from the main body. Some materials can only be obtained this way. An example of a breakable part is the Rathian's tail from which you can possibly carve a Rathian spike, a rare Rathian plate and on High Rank a hard-to-get Rathian Ruby.


Mounting a Monster
It is possible to mount a monster by doing a jumping attack after leaping from the edge of a cliff or high terrain. Once mounted you can continuously press triangle to damage the monster and eventually lead to a finisher specific to your weapon. Once successful, the monster will get knocked down allowing you and your group to deal significant damage. During a mount the monster may try to shake you off, press R2 to brace which to counter the stamina drain. You will get thrown off if you run out of stamina. Additionally, the monster may try to ram you into trees or walls. This can be avoided by pressing the left analog stick to move from your position on the monster's back. After a successful mount, it will be harder to mount the monster again due to an uptick in the mounting damage threshold. Basically, damage done airborne is mounting damage. Just keep dealing damage this way and it will eventually be mounted again.
In addition, pay attention to the hints given to you by the user interface. Once you progressed enough, the game will no longer display what you need to do in the middle of the screen (training wheels off, buddy). However, on the upper left, you'll see your options and the best one being highlighted in a box. In the screenshot you'll see Spirit Storm or the triangle button being highlighted. It shows that your special weapon move is ready at that specific time. If you see Brace being highlighted then press R2 as the monster is trying to shake you off, the stamina bar will also glow red and shake during that sequence, you can either brace to counter the stamina drain or move to a different position. Note that moving to a different position though will take a little stamina. The mini-map is also a good thing to pay attention to, when it glows red it means the monster is trying shake you off or ram you into a wall or an obstacle, and as mentioned above, move to a different location on the monsters back by pressing the left analog stick. The Insect Glaive is a weapon that specializes in this new mechanic. You can easily perform jump attacks with its features as well as do more damage when moving from one part to another on the monster's back.

Capturing a Monster
Capturing a monster is a great option when farming for materials. It grants more rewards compared to simply finishing off the monster. In order to do this, you have to weaken the monster to a point that it decides to go back to its nest to sleep. A skull on the monster's icon in the mini-map or a heart rate close to flat line are indicators that it is near death and wanting to retreat to sleep. Track it down and place a pitfall/shock trap beside it during its sleep. Once it is trapped, you can use a tranq bomb or tranq ammo from your weapon to capture it. Check out this video , at around 14:25 is where I setup to capture Rathian.Take not that elder dragons cannot be captured.

Your Palico is your best furr-iend. Not only can it deal damage and distract the monster for you, he can also use different gadgets to support and match your playing style. All throughout the game your Palico can recruit other feline creatures called Grimalkynes with varying roles and will teach your buddy the ability to recruit small monsters called Tailraiders. This needs to be unlocked by doing the certain quests specific to each Grimalkyne tribe.
Check this article for a more detailed explanation on this feature:
A Closer Look at Palicos in Meowster Hunter World: Gadgets, Tailraiders & Palico Safari
[4.0] Story Mode
I am currently doing a playthrough and hopefully would be able to create a detailed walkthrough. First few parts will have no commentary and some will be delayed as I am struggling to deliver all these stuff in a short time. I was also still exploring and figuring things out so there are lots of bumps and clueless acts in this playthrough. I still had a lot of fun, this game is very addicting. Ha ha. What even amazes me is that during the cutscenes, my character is wearing the exact armor I have at that time. Downside is that the character does not talk at all. He he.Back to top...
[5.0] Quests and Facilities
Below are some information on the types of quests, facilities and features found in Astera. In the Tradeyard you'll find the Resource Center, Provisions Stockpile, Ecological Research Center, Botanical Research, Poogie, your room, and eventually unlock the Argosy Captian and Elder Melder.Online Sessions and Joining Quests
To play online, PlayStation Plus membership is required. If you already have it then you're good to go. Simply create an Online Session or Join other people's Online Session. If you can't play online then it will simply direct and ask you to go into offline mode. To interact with players pre-quest you need to go the Gathering Hall. Only players in the same online session will be able to see each other and eventually join each other's posted quests. Take note of the following details.
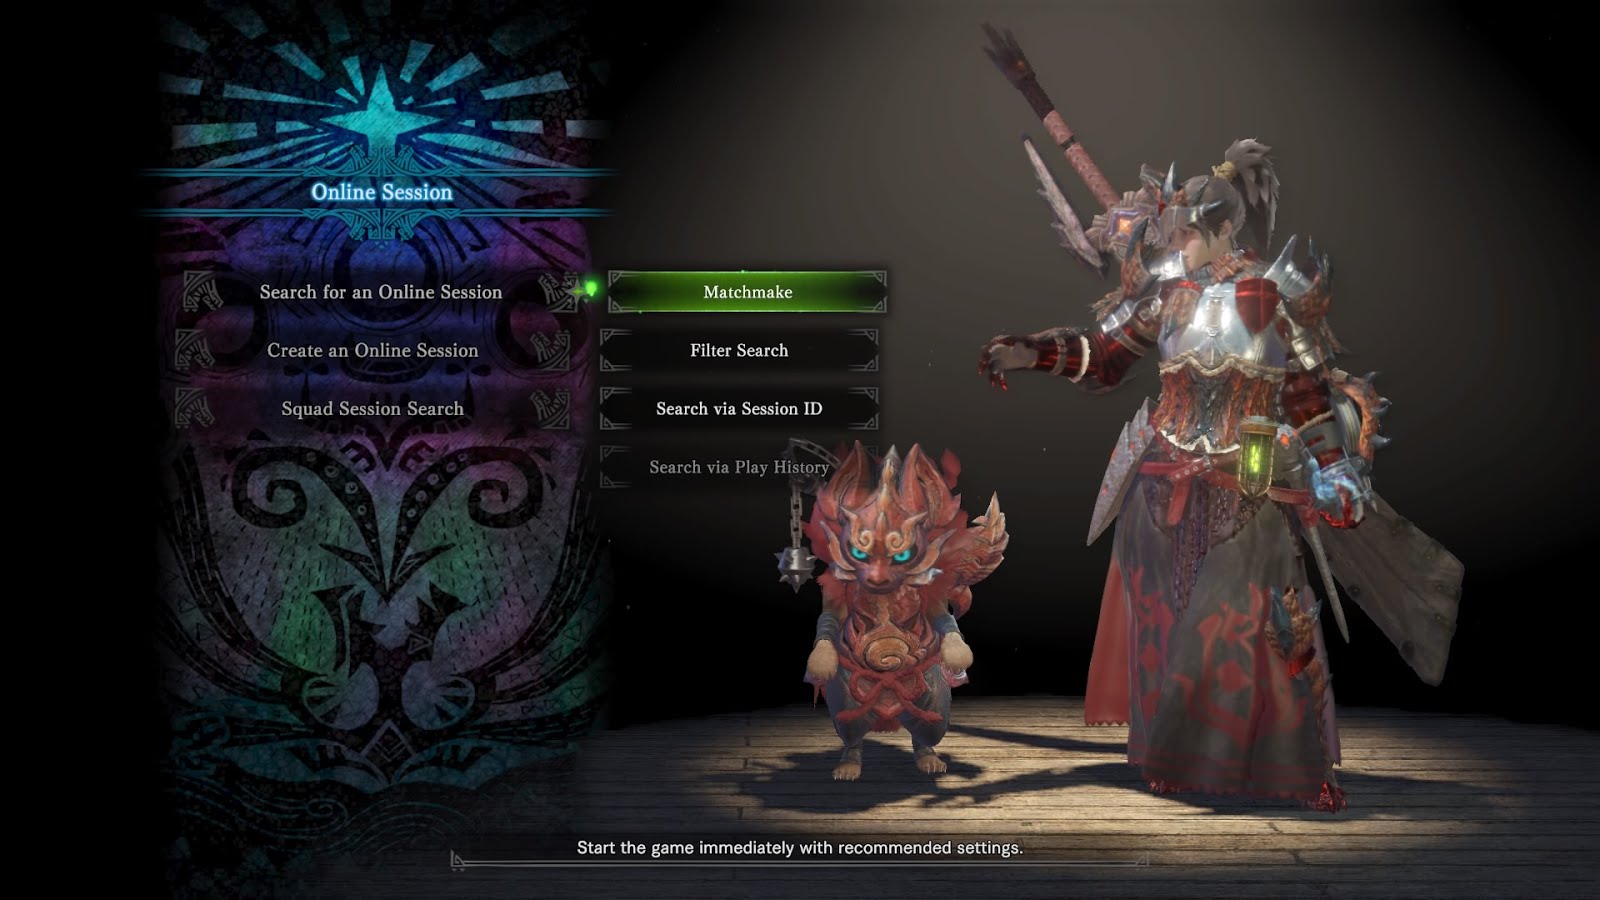
Search for an Online Session:
Matchmake - will assign you to a random online session available
Filter Search - will search for an online session based from a set of criteria such as Player Type, Quest Preference, Hunter Rank, or Language
Search via Session ID - enter a specific Session ID, these ID's are alphanumeric and case sensitive. Use this if you want to join someone else's online session. (Honestly, these ID's are a pain. Ha ha)
Search via History - displays Online Sessions you previously joined in
Create an Online Session - create your online session. You need to set criteria such as
Player Type, Quest Preference, Hunter Rank, Language and the option to set it as a private session.
Squad Session Search - displays a list of Squad you are in. This is why it is very convenient to have a squad. A squad will have a constant session ID, thus joining an online session with squad members will be fast and easy without having to enter those long session ID's.
If a player posts a quests, a notification will appear on the right side of the screen and players in the same online session can join in via the quest board. You can set a passcode for a quest if you want it to be private. A quest can have a maximum of four players depending on the quest conditions. The Zeny reward for each quest is equally divided among party members. You can also claim lucky vouchers from your daily login bonus which will double the amount of zeny you receive after a quest.
S.O.S Flares
If you are having a hard time with a monster or quest, what better way than to ask for your friend other hunter's help? Keep in mind though that when another hunter joins you, the difficulty will be scaled. Even just having two members on the party will raise the difficulty equivalent to four persons. We believe the monster's health is increased and not the damage. You have to be in sync with your teammates as the number of faints assigned to the quest is shared by all members. Sometimes this can do more harm than good. Still, this shouldn't discourage you as there are plenty of good players around. Communication is key. Maybe invest in a good mic and talk to your teammates. When in story mode, you can fire your S.O.S flare after the cutscene when you first meet the monster. This is on your Radial Menu by default. Hunter's can find and join those who fire flares by joining a quest on the quest board under Join a Quest and then Respond to S.O.S, and you will be able to join that online session. Some trophies can be earned by lending a helping hand.

 You can access quests via Quest Board or the Handler. Upon opening the quest menu you'll find Assigned, Optional, Investigations and Events.
Assigned - this are the quests you need to take to advance with the story
Optional - optional quests given by various NPC's, usually unlocks certain features in the game or Astera facilities' improvements such as the Canteen and Botanical Research. Take note of the dialogue balloon icon on the left side of the quest name. This means that the quest may unlock canteen ingredients, capture quests for the arena, botanical research item, etc.
Investigations - these are quests which are unlocked randomly by killing certain monsters or gathering monster tracks. Investigations can be unlocked via Tailraider Safari as well. These quests will offer additional rewards but can only do them a certain number of times. More info on the Resource Center.
Events - event quests which are available within a certain duration. Example is the "Lessons of the Wild" quest released during the early days of the game in which players can earn Watcher Lens as rewards to craft the Horizon Zero Down armor for the Palico. Click here and keep yourself updated.
Special Assignments - added on the Deviljho update (MHW ver 2.0 onwards). Might be the means for questing when a new monster is added. For of which was Deviljho and rewards Dragonproof mantle upon completion.
Special Assignments - added on the Deviljho update (MHW ver 2.0 onwards). Might be the means for questing when a new monster is added. For of which was Deviljho and rewards Dragonproof mantle upon completion.
Resource Center
The Resource center is like your source of sidequests and additional rewards. Here you'll find Bounties, Investigations and Complete Deliveries. You can access this on the Tradeyard in Astera.


Bounties - these are typical sidequests such as gathering mushrooms, plants, bonepiles or killing certain types of monsters which you can do while you are exploring the map on your main quest. Make sure to assign as much as you can before going out on you main quest as these are fairly easy to do and will reward you with research points, zeny and armor spheres. Under bounties are critical quests and limited quests. Critical quests are quests that usually unlocks a feature or item. Limited quests are usually updated on a weekly basis and will have you hunt specific monsters multiple times.


Investigations - as mentioned on the quest types above, you have to register them here in order for them to appear on the quest board. They offer extra rewards with the rarity depending on Bronze, Silver or Gold. I got a Rathalos Ruby using this quest so they are definitely worth it. There is a limit on how many times you can do a specific investigation (check the number beside the quest), once it runs out you just have to get more by gathering tracks and killing certain monsters. Having better rewards, they may have conditions that are harder than your average quest such as lower time limit and faint count.


Complete Deliveries - sidequests in which you are to submit certain materials to unlock or improve other facilities or opening new camps in maps.


Botanical Research
This is found on the Tradeyard. As you progress into the game you will be able to unlock the botanical research. You can cultivate materials such as plants and insects. After a quest you can go back to use fertilizers to increase your harvest count or speed up growth. This is particularly useful in getting frequently used items such as Honey and flashbugs. The rarity of items you can cultivate and the harvest box storage can be improved further by doing certain optional quests.


The items that can be cultivated are divided into 3 categories: Plants, Insects/Honey, Mushrooms. A total of 3 items can be cultivated with at most 30 harvest slots, depending on how much progress you have made in improving the Botanical Research facility. You start out with 1 item and 10 harvest slots. Doing the following quests will grant you more item slots and harvest slots:
Persistent Pests (HR8 or higher): Kill 14 Hornetaurs - increase cultivate item slot by 1
Talons of Ire and Ice (HR13 or higher): Kill Odogaron and Legiana - increase cultivate item slot by 1
To Hold a Harvest (Complete Deliveries): Deliver 2 Aqua Sacs (From Jyuratodos, low rank) - increase harvest slots by 10
Your Storage Solution (Complete Deliveries): Deliver 1 Torrent Sac (From Jyuratodos, high rank) - increase harvest slots by 10

Fertilizers can be used once after each quest at the cost of research points. These fertilizers have different effects and must be specific to the type of item you are cultivating. Pay attention to the effect on the right side of the screen as it says "Plant Harvest Up" and "Bug/Honey Harvest up" which will increase the quantity harvested for each slot and items with "Growth Up" will speed up harvest time. These fertilizers will last for a certain number of quests so make sure to check back after most of your quests to keep them boosted.

One way to farm zeny is by cultivating Might Seeds which sells for 140z a piece. It may not look much but in huge quantities this will give your wallet a good boost if you are in need.
Ecological Research
This is where you get your Monster Field Guide info on your Hunter's Notes. Make sure to visit this often to update your field guide levels. No matter how many tracks or hints you've picked up the research level will only be updated once you have visited this facility to. Killing monsters and gathering their tracks will level up your monster research levels that will give you valuable information from weakspots, breakable parts to low rank and high rank rewards. You can also see your scoutflies level here. Overall, leveling up this guide will make your hunting life easier in the long run. This is found on the Tradeyard beside the Botanical Research. Scoutfly levels are not permanent and will degrade in the long run if you are not consistently hunting that specific monster. However the research level for that monster will have an effect on how fast you can bring that scoutfly level up based on the screenshot below. Sometimes you will only need 1-2 tracks from the monster in order for the scoutflies to lead you directly to the monster and see the status in the map. Level 1 scoutfly provides guidance to next monster track, level 2 will provide guidance to the monster itself and level 3 will provide monster status and destination of the monster. To make the long story short, just keep getting tracks and increase those monster research levels which will ultimately affect how well or fast your scoutflies can lead you to your target.


Smithy and Armory
Found in the second floor of Astera. This is where you can forge and upgrade your weapons and armor. When you get to high rank you can also change the color pigment of your high rank armor. Make sure to do the sidequests given by the NPC's here to unlock Mantles and other features as well. You can also buy low level armor which you want to upgrade for your weapon trees here. Another feature notable is augmenting which will further enhance your weapons and armors. To unlock the feature you need to have a warrior's streamstone or hero's streamstone which is a rare drop from tempered monsters, usually tempered Elder Dragons. Streamstones used for armor augmenting are different from these weapon streamstones. Oddly enough, the augmentation option only appears when you get the streamstones mentioned above specific to weapons.


Augmentation is one of the ultimate end game goals as it unlocks powerful upgrades for your weapon and break the upgrade limit for your armor. For weapons you have a choice of upgrading with Attack Increase, Affinity Increase, Defense Increase, Slot Upgrade or Health Regen. Augmentation only works for the final weapon on their corresponding trees.

Here are the benefits of augmentation for weapons:
Attack Increase – increases the raw damage powe
Affinity Increase – adds 10% Affinity
Defense Increase – plus 10 defense and a chance to reduce incoming damage
Slot Upgrade – additional decoration slot to a weapon
Health Regen – regenerate health when landing attacks
Rarity 8 weapons can be augmented once, Rarity 7 twice and Rarity 6 thrice.
You need streamstones specific to the weapon such as Hero's Streamstone: Axe for Axes and Charge Blades. Hero's streamstones are used for Rarity 8 and Warrior's streamstones for Rarity 6 & 7. In Summary:
Rarity 8 - 1 augment, 1 Hero's streamstone.
Rarity 7 - 2 augments, 2 Warrior's streamstones
Rarity 6 - 3 augments, 1 Warrior's streamstones
For armors, you can just upgrade it further to a certain point for more defense points but no added effects.
Canteen
Found in the second floor of Astera. This is where you can eat food that will grant you some buffs such as improved health, stamina for you and your Palico, as well as attack, defense, elemental resistance and more importantly food skills. Do this before every quest to make your life easier. There is a mini-version at the camp beside your tent during quests. More on this when the guide is up.


Provisions Stockpile
You can basic items here such as potions, trap tools, barrels, ammo, etc. The quality or rarity of these items improve depending on your progress. This can be found on the Tradeyard. After successfully guiding away Zorah Magdaros in story mode and high rank, you can buy the Powercharm and Armorcharm here. There are valuable items that only need to be in your item pouch to provide added attack and defense. These two can also be used to craft Powertalon and Armortalon (Power/Armorcharm + Bazelguese Talon). These items stack so make sure to save up some zeny as having these four items in your inventory will cost you a lot but definitely worth it.


Elder Melder
Apart from crafting and hunting materials, you can also meld certain items here. Melding usually requires typical materials which produce meld points. From items such as Mega Potions, Traps, Mega Demondrugs, there are some rare items here but require tons of meld points and specific items such as wyvern prints and commendations. Use them wisely. This is unlocked at high rank I believe. She is found in the tradyard beside the Resource Center.


Ever wondered where to use those Wyverian Prints you get from the Bounties? Well you can eventually exchange them for rare plates or gems. To meld, you will need to provide the required ingredients with a quantity that would yield the required meld points. This will also consume some researrch points. In the screenshot below you need 1 Gold Wyverian Print to produce 100 meld points and 300 Research points to successfully meld a Nergigante Gem. This is useful if you do not have the time or patience to farm and hunt Nergigante or simple of the RNG isn't to friendly with you. Talk about some people having bad luck. He he.

As you progress into the game you will also unlock the ability to Meld decorations. You can use your spare jewels here to meld a specific jewel you want. This will require sacrificing a lot of spare jewels though and tons of research points so only do this if you are desperate for that specific jewel (most are element related and some are easy to farm).

Next off is the First Wyverian Ritual. Think of this as the game's way of making you gamble. You need to provide a Streamstone Shard, Streamstone or a Gleaming Streamstone and a lot of jewels to produce up to 3 random jewels. Some high rarity jewels can be earned this way and the more expensive melding technique used, the higher the chance of getting these--Spire Sorcery being the cheapest and Strange Stream as the most expensive. Only do this if you have the research points and jewels to spare. And no, you can't cheat your way around here, buddy. I know what you're thinking. It will ask you to save the game upon getting all the required points and jewels. Thus, you can't simply reset or exit the game if you got a crappy jewel in return. If the RNG hates you so much you might even get level 1 jewels out of all these techniques. So use at your own risk. The meld point values will vary per jewel as you can see in the screenshot. Additionally, the elder melder can only produce up to a Worn Feystone using the First Wyverian Ritual. For more details check this link.

Argosy
Every few quests (3 I think), the Captain of the Argosy will be available behind the Provisions Stockpile. You can get some rare items or materials at the cost of research points. Additionally, you can request for the type of item you want such as materials, consumable items or trade-in items so that on his next return to Astera the inventory will be specific to your requests. This is also unlocked at high rank I believe. I can confirm that you can get a gem from this as I got a Bird Wyvern Gem. It will be interesting if we can also get monster-specific gems from him.


Your Room
Here you can find the housekeeper cat on which you can claim your DLC stuff, access the training area and the Tailraider Safari once it is unlocked. You can also place your pets or endemic life here. These pets are small creatures such as birds, insects or fish that you can capture on the map during your quests. Some of these are rare and will require more effort. Get them by using your capture net. More on this on future guide updates. As you progress into the game you can move into private suite which is more spacious and luxurious. An Endemic Life guide will be posted in the future.

Training Area
As the name implies, this is where you can train and practice your moves and combos with your weapons. The training area also has slopes and cliffs where you can practice jumping attacks as well as different types of barrels where you can try the effectiveness of your weapon of choice. The basic combos for your weapon is also displayed on the screen. You can access this through the housekeeper in your room.

Gathering Hub and Arena
Found on the 4th floor of Astera. You can hang out with other hunters in this area during an online session. The gathering hub will allow you to interact with your fellow hunters and can even do some arm wrestling. lol. This is where you can create squads or hang out with the members. You can join and switch between a total of 8 squads. Quests can also be posted here. Sorry for the screenshot, I was alone at that time. Ha ha. From here you can also access the Arena, special quests or challenges that will reward you with Coins which can be used to craft specific weapons. Arena quests or challenges will have preset of equips you can use to defeat a certain monster. Take not that these are different from the ones that appear in your optional quests. These are the real deal and may take some time to achieve great runs. The difficulty is scaled for multiplayer even in solo mode.


Poogie
Look at this cute little piggy. It may be a myth but some say petting it may bring you good fortune during your quests. You can even dress it up, carry it around or even change its name. Myth or not, no harm in petting this cutie before you dive into action. You can unlock more outfits as you progress into the game. You can usually find it roaming around the Tradeyard. More on this once I have unlocked the outfits.


Back to top...
[6.0] Weapon-Specific Guides & Builds
I am still practicing on most weapons and working on my own vids as I would like to add my own touch and say a few more things about a specific weapon. You'll find the links to certain guides and builds below which I found most helpful. I am open to adding builds here for the community if you want to contribute please contact me.[Dual Blades]
Dual Blades - Fextralife Guide
How to Dual Blade the Right Way - Deuce Hunter
[Charge Blade]
Charge Blade - Fextralife Guide
Charge Blade - Arekkz Guide
Charge Blade - Gaijin Hunter Guide
[Great Sword]
Great Sword - Fextralife Guide
Great Sword Tip - Deuce Hunter
Great Sword - Arekkz Guide
[Longsword]
Long Sword - Fextralife Guide
Long Sword - Arekkz Guide
Long Sword - Gaijin Hunter Guide
[Sword and Shield]
Sword and Shield - Fextralife Guide
Sword and Shield - Gaijin Hunter Guide
[Switch Axe]
Switch Axe - Fextralife Guide
Switch Axe - Arekkz Guide
[Lance]
Lance - Fextralife Guide
Lance - Gaijin Hunter Guide
[Gunlance]
Gunlance - Fextralife Guide
Gunlance - Arekkz Guide
[Insect Glaive]
Insect Glaive - Fextralife Guide
Insect Glaive - Gaijin Hunter Guide
[Hammer]
Hammer - Fextralife Guide
Hammer - Gaijin Hunter Guide
Hammer - Arekkz Guide
[Hunting Horn]
Hunting Horn - Fextralife Guide
Hunting Horn - Gaijin Hunter Guide
[Bow]
Bow - Fextralife Guide
Bow - Arekkz Guide
[Light Bowgun]
Light Bowgun - Fextralife Guide
[Heavy Bowgun]
Heavy Bowgun - Fextralife Guide
Back to top...
[7.0] Monster-Specific Guides
Same as the weapons guide, you can find detailed information about the specific monsters on the links below. Most are work-in-progress and being updated day-to-day. In the long run, I'll be posting some vids on these monsters. Once you have progressed enough in the story, you will encounter stronger versions of these called "tempered monsters". To get Investigation quests for these tempered monsters, you will need to gather blue monster tracks on your other quests and expeditions. Take note that tempered versions have higher attack but have the same amount of health. The monster's icon will be highlighted in purple indicating that this is the tempered version. There are other versions as well which you will encounter in the story as you progress which will yield different materials as they have some features different from the original monster such as the Pink Rathian, Azure Rathalos and Black Diablos. They might be more aggressive or have extra armor on some parts. More on this soon. Here is a simple monster weakness chart as well from my friend Hecai. You can download the sortable file here.
[Large Monsters]
Anjanath
Azure Rathalos
Barroth
Bazelgeuse
Black Diablos
Deviljho
Diablos
Dodogama
Great Girros
Great Jagras
Jyruatodus
Kirin
Kulu-Ya-Ku
Kulve Taroth
Kushala Daora
Lavasioth
Legiana
Nergigante
Odogaron
Paolumu
Pink Rathian
Pukei-Pukei
Radobaan
Rathalos
Rathian
Teostra
Tobi-Kadachi
Tzitzi-Ya-Ku
Uragaan
Vaal Hazak
Xeno'Jiiva
Zorah Magdaros
Tempered versions will have what we call "Threat Levels" as follows:
Threat level 1 - Pukei-Pukei, Tobi-Kadachi, Anajanath, Barroth, Jyuratodos, Rathian, Paolumu, Radobaan
Threat level 2 - Rathalos, Diablos, Bazelguese, Odogaron, Pink Rathian, Azure Rathalos, Legiana, Black Diablos, Uragaan, Lavasioth
Threat level 3 - Kirin, Nergigante, Kushala Daora, Teostra, Vaal Hazak, Deviljho
Exceptions - Great Jagras, Kulu-Ya-Ku, Tzitzi-Ya-Ku, Great Girros, Dodogama, Zorah Magdaros, Xeno'Jiiva, Kulve Taroth
[Endemic Life]
This section will be updated in the future.
Back to top...
[8.0] Advanced Guides, Misc & Tools
This section will be filled eventually with some advanced guides such as "How-To's", Misc, Tools and Tips.- All Palico Gadgets and Tailraiders Guide
- Decoration Categories and Drop Rates
- How to Get All Mantles and Boosters
- How to Get All Poogie Clothing and Useful Items (Dung, Meal Vouchers, Mega Nutrients, etc.)
- Monster Hunter World 2.0: Deviljho Update
- Spring Blossom Event Guide
- Monster Hunter World 3.0: Kulve Taroth Update
Here are some tools for HR Set builder, damage calculator and other stuff (Not mine, full credit to the authors or creators, great job!):
- HR Armor Set Builder
- Monster Hunter World Armor Set Search
- Monster Hunter World Armor Builder
- Damage Calculator
Here are some videos and articles that you may find useful, some are not mine but I find pretty useful and informative (credits to the authors/creators):
- Monster Hunter World: Fast and Convenient Way to Farm or Capture Rathian
- Doing the Superman Dive
- Getting to Legiana's Nest Faster with Glider Mantle
- Arekkz Guide to Farming Tempered Investigations
- A Good Article Regarding Damage (from reddit)
- A Good Article Regarding Affinity and Critical Eye Mechanics
- Handicraft Sheet for All Weapons
- Kulve Taroth List of Relics/Weapons
Back to top...
[9.0] General Tips
- During combat, do not get greedy with hits. Observe the monster's movement and limit your hits so that you are ready to dodge its attacks, unless the monster is stunned, trapped, or knocked down.
- When gathering materials to forge equipment, you can use "Investigations" quests on the Resource center instead of repeating a specific quest. These Investigations have more rewards but may have less time limit or extra conditions. If the investigations do not have the specific monster you are looking for, you can simply go out of Astera for an expedition. This is good for gathering materials as there is no time and faint limit.
- Before embarking on a quest or expedition, make sure to get and register some Bounties in the Resource center such as gathering stuff from bonepiles, mushrooms, plants, and killing a certain amount of small monsters and large monsters. You can earn additional points, zeny and armor spheres this way.
- Always pick up items in your environment (unless you have an abundant supply and you are sure that you are not going to need it), you never know when you need to use it or it might be a material useful for crafting other items.
- Always pick up clues such as tracks, gashes, mucus, and other stuff that help you track the monster. This will not only help you track a certain monster faster, but also help you build up your Hunter Notes or the monster field guide. This is the info also found in the Research Center. At level 3, you'll be able to view the possible item drops after breaking and carving a specific monster part.
- If possible, capture a monster rather than simply finishing it off. Capturing offers more rewards.
- You do not need to upgrade to a new available armor set each time. You can choose which one you like or need most and then upgrade it with Armor Spheres and fill the gap in defense values. This will be the case for low rank armors. Do not be afraid to use your armor spheres as you can farm them using bounties mentioned above. It seems the rarity and hunter rank affects the levels in which you can upgrade it. Given that, the advantage with higher rarity gears is that you don't need to upgrade them as many times compared to lower gears. You can stick with the armor having the features you want and upgrade them with armor spheres to improve defense. This will be the case in this tier or low rank. I usually only upgrade when I feel I hit a wall or having a hard time keeping up with the monster's damage. When you get to the high rank, you will have the option to create Alpha and Beta armors which will possibly be your end game armors. Even a fully upgrade low rank armor will have lower defense than the high rank versions so usually, priority is getting to high rank and only upgrade and use what you need to get by. But... don't forget the most important thing is having fun, so if you're having tons of fun collecting or completing armor sets, no one should stop you from doing so.
- If you find yourself being bothered by that annoying Bazelguese during your hunts, use a dung pod at him and he'll fly away.
- You can organize and save your current item pouch and radial menu settings via item box. Go to your item box and press option button to bring out the load out menu. Press triangle to save current configurations and items to loadout slot. This is very useful if you switch items and radial menu settings all the time
- Always do optional quests especially the ones with balloon icon on the left side as this will unlock a feature or improve your facilities in Astera such as canteen ingredients, botanical research stuff, etc.
- Always bring flashpods and flashflies especially for flying monsters. Upon a successful flash it will drop them down hard on the ground to your advantage.
This section is open to fellow hunters who might want to share something useful to the community.
Back to top...
[10.0] FAQ's
Q: Is the inventory unlimited? Do I run out of slots for my equipment and materials? Do I sell my unused or old gear?A: We need a veteran to confirm this, but it seems the item box is unlimited as a new page is added when the slots are filled. No need to sell old stuff unless you need zeny or just want an organized inventory. UPDATE! A total of 40 Pages available, that's a lot but if you are busy collecting everything you might need to sell some old stuff in the future.
Q: Why can't I join someone else's quest in story mode?
A: You have to wait for them to finish the cutscene when he initially meets the monster. Your cue would be "S.O.S flare can now be used" to join in. You can now either use the S.O.S. flare or have your friends join you. What we usually do is party up outside of the game in the PS4 menu and have them join the online session after the cutscene.
Q: What is the best weapon in the game?
A: All of them. It all depends on your playstyle or the role you want to take. Swords are usually good for cutting tails while Hammers are used for stunning the monster by hitting them on the head. Insect Glaive can be good for mounting, Hunting Horn for buffing teammates, etc. The best way to go is to study and try them all and find the one you are most comfortable with or one that gives you a hell lot of fun.
Q: How do I kill that f**** Anjanath???
A: Most new hunters face their first wall c/o this Fire-breathing T-Rex. The only way to get through this is practice and experience. You may also want to craft some gears such as the Pukei armor to give a little defense boost before facing him. But overall, just don't get hit much especially with his devastating attacks. When his back fins are up, be extra cautious and watch for his diving attacks. When you see embers flare on his mouth, be mindful of his fire breath which can usually one-shot you if you don't have decent fire resistance. Staying between the legs and hitting them is also a good strat but doesn't do that much damage compared to the head/neck or tail.
Q: I only have one Palico Gadget, how do I unlock the others? What is Tailraider Safari?
A: You'll have to trigger certain and events and do some quests, answers on section 3.8 on the Palico information or click here.
Q: My Radial Menu configuration keeps going to default or getting reset, why?
A: Radial Menu settings are saved with item pouch loadouts, if you are loading different load outs it will reset to the radial menu settings during the time you saved a specific loadout. Read general tip no.9.
Q: What is the skull icon above the monster in the mini-map? What is that U-shaped icon on the monster?
A: The skull icon indicates monster is near death, the U-shaped icon is actually an eye indicating if the monster is aggressive towards you or enrage. Refer to Navigation section above or this video.
This section is also open to fellow hunters who might want to share something useful to the community.
Back to top...
[11.0] List of Patches
Patch List - Full Details HereJanuary 26, 2018 - Day 1 patch, multiplayer and events, etc.
February 2, 2018 - Small bug fixes
February 9, 2018 - Bug fixes, Xbox Matchmaking Fix, Slicing Ammo nerf, etc.
February 15, 2018 - Bug fixes, performance and stability improvements
March 22, 2018 - Version 2.0, Deviljho Update
April 4, 2018 - Dragon Piercer and Arena Bug fixes
April 19, 2018: Version 3.0, Kulve Taroth Update
Back to top...
[12.0] Outro
You have reached the end of this guide... or not! Like I said earlier, I will be updating or improving this entry as needed. I hope we were able to help you understand the basics or learn about the different facets of this game. Please do comeback from time to time to check on new updates. Maybe drop a comment for requests or if there are things that need to be discussed or corrected in this guide. I want this to be an open discussion to everyone, let's help each other out as I am also still learning and trying to get a good grasp of this game. I am also open to contributors, see if we can collaborate to make a much detailed guide.Ugh, I need to get good in this game. He he. Feel free to add me on PSN and let's play if we have the opportunity. My PSN ID is gedaii_
May the hunt be ever in your favor and may the Sapphire Star light your way!
Back to top...
[13.0] Joining the Community and Other References
I would like to take this opportunity to invite you to join the Monster Hunter communities on Discord, FB and Reddit. It has been a pleasant experience interacting with everyone. There are a a lot of cool and nice guys out there. I assure you it's worth your time as you would not only learn useful stuff from the veteran hunters but also gain new friends to work with in your journey. You can find a lot of people looking for party members out there, so if you're struggling to find teammates this is a good place to go.If you are interested check these out:
Fextralife's Monster Hunter World Wiki
Fextralife's YouTube
28 Games Later Youtube
[Facebook Groups]
Monster Hunter World (PS4)
Monster Hunter World PS4 Xbox One PC
Monster Hunter World Ph
Monster Hunter World Philippines
[Reddit]
MonsterHunter Subreddit
MonsterHunterWorld Subreddit
[Discord]
Monster Hunter: World Discord Invite
Back to top...
[14.0] Blog Future Content and Updates
My main objective is to help out fellow hunters starting from new and maybe eventually experienced ones when the advance guides and new stuff are up. However, I am a busy guy and I have been really struggling to deliver pieces in time. These are some updates that will be included in the future. I want to deliver content only once I have unlocked or reach that certain point in the game as I feel accountable for whatever I write here, thus it's taking a veeeery long time. *insert sad face here*Below are some ideas and wants for this guide, a lot of people have already released some of them but I might make my own in the future be it on this article or a different one.
Monster Field Guide Updates - gathering data and paraphernalia
Canteen Details and Guide - initial draft started
Endemic Life Guide - initial draft
Arena Guide - initial draft
Long Sword tips/builds- paraphernalia ready but not yet started
Slinger In-Depth guide - not started
[15.0] Changelog
January 24, 2018: Initial Draft
January 31, 2018: Published
February 1, 2018: Corrected Armor General Tip, Updated Affinity, Mounting & Armor Sections
February 2, 2018: Updated Palico Gadgets and Tailraiders Section
February 5, 2018: Minor updates, Added FAQ section
February 6, 2018: Minor updates, Added PH group Facebook links, Added Future Content Section
February 10, 2018: Added Palico Gadgets and Tailraders Guide, Some Minor updates
February 16, 2018: Change section numbers & renamed Section 5.0, Several updates notably Section 5.0, Added HR Armor Set Builder Link and Superman Dive
February 19, 2018: Minor updates, some Screenshots changed or optimized, Added Decorations/Jewel Section
February 21, 2018: Added simple monster weakness chart, auto-craft using radial menu video, minor updates
February 22, 2018: Minor updates, optimized some sections
February 24, 2018: Added Anchor Links, Minor Updates, Added Mini-map Icon Explanations
February 26, 2018: Improved some information on Quests and Facilities
March 1, 2018: Minor updates, added links to Decoration Drop Rates and info
March 18, 2018: Added some augmentation details, Updated useful links, Mantles and Boosters Guide
April 3, 2018: Updated some links and guides, minor updates
April 23, 2018: Added a few links and some minor updates
https://crackeykick.com/mixed-in-key-torrent/
ReplyDeleteMixed In Key Crack is straightforward and easy to use. All you need to do is to download this software and install it in your devices. Moreover, after that, activate the software with the help of the activation and license keys.
https://vikipc.com/digidna-imazing-crack/
ReplyDeleteDigiDNA iMazing Crack is a beautiful application that users can use to carry data from one device to another device. From one system to another system easily.
https://pcsoftfree.com/portraitpro-torrent/
ReplyDeletePortrait Pro Crack improves the user interface which makes to find easy to control for a new user. Internet connection is not important for image processing.
wavepad-sound-editor-crack
ReplyDeleteThis guide sounds very comprehensive and helpful for both new and experienced players.
ReplyDelete